DevOps diagram by Kharnagy
If you write software, it’s likely you are using GitHub for source control, CICD, and potentially for your DevOps processes. It has plenty of free features, and with an estimated market share over 80%, chances are all other devs you know are using it too. Even with all this, you may want to consider using Azure DevOps (ADO) as a free DevOps solution (with limitations of course).
Why choose ADO over GitHub? If you have a small team of 5 or less, you can get a lot of (easily integrated) features for free, above what GitHub offers. This diagram by Antonio Alvino shows ADO services and their GitHub alternatives under the new direction from Microsoft, but there are plenty of gaps. I’ll run through how to get an Azure DevOps project up and running and make use of some of these additional features.
Comparing Github and Azure DevOps
Key features
Github: Ease of integration to GitHub repo/issues, quick/easy to setup, easy collaboration, basic reporting, YAML file in repo for CICD pipeline, free dependency security alerts (dependabot), free CodeQL code scanning (for public repos in an organisation). Codespaces (Web based VSCode fork editor – github.dev – with hour limits). Unlimited users to collaborate. Read more
Azure DevOps: Suited more to medium/large enterprise use. More complex to setup and complex workflows, role assignment / permissions. Ease of integration to ADO git repo, GitHub, bitbucket, SVN, and more. Unlimited git repo hosting. Version/release/approval/environment management, advanced reporting, visual (classic) CICD editor and repo YAML file. 5 free users. Read more
DevOps process management
Github: Offers projects with simpler (customisable) management templates for different DevOps aspects (sprints, feature release, retro etc). Workflow automation integration with Github Actions. Simpler DevOps process reporting / charting.
Azure DevOps: More complex DevOps management, highly customisable DevOps process templates and workflows (Agile, Scrum etc). Sprint, Task, Delivery management, Release approval and artifact management, Easy test/code coverage reporting integration. More complex reporting. All free for 5 users
Free account limits
Github free for personal / organisation: 2000 minutes/mo CICD agent, 500MB artifacts/packages. Unlimited users for collaboration Priicing Details
Azure DevOps: 1 free Azure hosted CICD agent with 1800/mo free minutes (you can add 1 self hosted agent with unlim hours) . 2GB artifacts free. 5 user collaboration limit Pricing Details
Mix and Match
You can also combine Github and ADO to take advantage of stronger features from either service. Or mix with Atlassian products for your DevOps processes. You can even migrate between YAML pipelines in ADO to GitHub actions as they are both YAML (and there is a converter tool for pipeline yaml to GitHub action). Personally, I lean towards using GitHub for the repo to take advantage of dependabot and CodeQL scanning while using ADO for CICD, Release management and Agile process management.
ADO does offer code scanning but at a price, alternatively you can add the free SonarQube extension to your ADO organisation and self host the community edition to code scan with no licence cost (just a hosting cost of SonarQube CE).
More alternatives
So what about other CICD/DevOps products with free offerings? Some of these have DevOps / Agile features for multiple users giving a feature rich alternative to Azure DevOps.
Bitbucket cloud: 5 users, 50 minutes/mo, 1GB storage. Code scanning for 3 repos. Easy integration to Atlassian products (free Jira etc). Details
Gitlab: 5 users, 400 minutes/mo, 10GB storage. Option for self hosting agent / storage. Open source (see below). DevOps process management (paid). Details
CircleCI: 5 users, 6000 minutes, 2GB storage, self hosted agents option. Details
Google Cloud build: Build agent only. 2500minutes/mo. Paid storage / networking Details
AWS CodePipeline: Build agent only. 100 minutes /mo but only under AWS 12-month free tier account Details
Open source
You could always host a container / VM with one of the below if you have your own equipment or have access to hosting.
Jenkins – only as a CICD agent
Gitlab community edition – a feature rich CICD and DevOps process management platform not far off from Azure DevOps/GitHub

Tutorial – Get started with Azure DevOps CICD
This tutorial will go through setting up key elements of an Azure DevOps project, repo and CICD pipeline types YAML and Classic.
Prerequisites
You wont need an Azure account or credit card to get started, but If you want to test deploying to Azure from the below CD you will need to set up an Azure subscription first (or grant your ADO user account access to the Azure subscription) and create a windows .Net 4.8 Azure web app (you can use the free tier, with basic SCM authentication turned on, and contributor IAM access for this account you are using in ADO).
To use the free CICD agent you will have to wait a 24hours to a few days to get approval after the first steps below. This wont block you from continuing but you wont be able to verify your pipelines until this approval occurs.
First steps
First up, go create your organisation and create a project space. If you don’t have a Microsoft account you can create a new one at the login screen. After login you will be prompted like below to create your Azure DevOps account / organisation.
Select an organisation name and hosting location close to you. Next create a private project named ‘test’ and hit ‘Create project’. You’ll then be taken to your new project space.


Get your free CICD agent quota
Click on project settings at the bottom left. Then under Pipelines > Parallel jobs > Private projects you’ll notice under Microsoft hosted you have 0 parallel jobs available which means you cant run any CICD jobs yet!

Go to https://learn.microsoft.com/en-us/azure/devops/pipelines/licensing/concurrent-jobs?view=azure-devops&tabs=ms-hosted#how-much-do-parallel-jobs-cost and click the request link to request your free MS hosted agent for private projects. This may take a while to be approved, you should get an email notification but can also check back at the above area. In the meantime continue on to the rest below.
Git repo setup
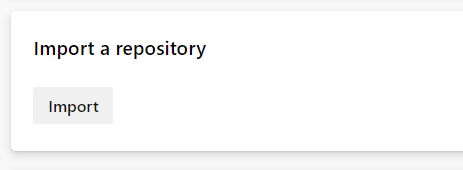
Next we want to setup a basic git repo so we can run some builds. Click on the Repos icon in the left menu then import button as pictured. Add in the URL https://github.com/Azure-Samples/app-service-web-dotnet-get-started.git and hit ‘Import’. After it’s processed you will be taken to the repo files view. Now let’s get a build running!

YAML vs Classic Pipelines
You have the option to create your CICD pipelines two ways. YAML has some UI helpers but is mostly text editing. Classic has a lot more UI to configure your pipeline and manages releases / CD slightly differently. Deployment for YAML is done using a multi-stage YAML pipeline, whereas in Classic pipelines you create release pipelines in the releases menu area. It’s also possible to mix a YAML build pipeline artifact (build output) with a Classic release pipeline. There is a table of advantages in both outlined in YAML vs Classic Pipelines such as task groups (to reuse sets of build/deploy tasks) and gates in Classic and using containers in YAML. We’ll start with YAML and then also create a Classic pipeline below.
From my experiences on various sized projects there is still value in Classic pipelines, especially for larger organisations with many environments, complex versioning, UAT process and release management. I would however recommend starting with YAML especially for smaller projects with only 1/2 environments to deploy to. You can always switch between the two if the situation arises.
Setup a YAML pipeline
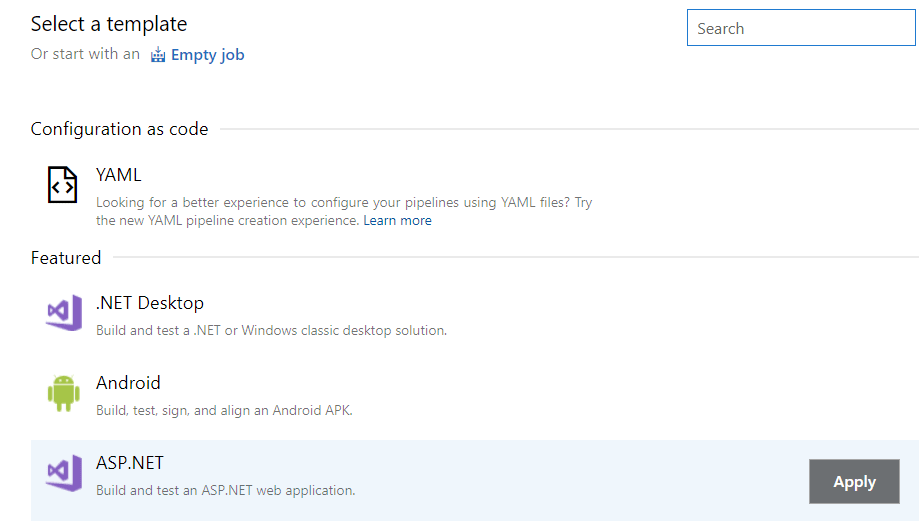
Go to the Pipelines left menu area and click ‘Create Pipeline’. Select the git repo you just created by first selecting ‘Azure repos git’. Next, a list of sample pipelines will appear, click show more and select ASP.Net (not core) as pictured then Next.


You will see the YAML file for your build pipeline. In this space you can edit via text or insert YAML text blocks from the side panel for build/deploy steps. Click in the top left and again ‘Save and Run’ without changing settings in the side dialog. This will push the YAML file into your main branch and initiate the pipeline. If you navigate back to your repo files you will see the new azure-pipelines.yml file.
Navigate to the Pipelines area and click on the recently created pipeline. It will likely have an error like below, as you need to wait for your free build agent quota to be granted. When it is available you can then click ‘Rerun failed jobs’

Setup a Classic pipeline
While YAML pipelines are recommended, and Classic pipelines are disabled by default, there are some some advantages over the YAML pipelines you may want to use for your build/release management. To enable this click the Azure DevOps logo in the top left then ‘Organization settings’ at the bottom left, then Pipelines > Settings. Turn off both the below switches for disabling creation of classic build/release pipelines.

Click the Azure DevOps logo in the top left then your ‘test’ project to get back to the right area. Your Pipelines left menu space will have a few new items that are used in Classic pipelines: Releases, Task groups, Deployment groups. You can create pipelines for releases with a handy visual editor that shows a workflow with triggers, approvals and gates.
Click on Pipelines in the left menu then ‘New pipeline’ you can see you have a few extra options for other git repos and SVN and the classic editor. Click on ‘Use the classic editor’. Select your repo, hit next then click apply next to the ASP.net template.

You will then see the editor (pictured below) which is quite different to the YAML editor we saw earlier . If you click on the ‘Build solution’ step then ‘View yaml’ in the right info pane you could even use these in your YAML pipeline you created earlier in your repo. You can also do this in ‘Agent Job 1’ to get the whole YAML. This is handy if you want to migrate to a YAML pipeline or aren’t sure what the YAML should be for a step in your YAML pipeline, you can take it from a prebuilt template here, then discard.


Click on the Triggers tab and check the ‘Enable continuous integration’ checkbox so any commit on the branch will run this pipeline. Click on the Options tab and you can see at the bottom badges for your build status you can embed on a site. Click on ‘Save and Queue’, this classic pipeline wont be stored in your repo like YAML pipelines are.
Setup a Classic release pipeline
The YAML pipeline we created in the repo earlier can be extended to a multi-stage pipeline to add the CD releasing side and even add in approvals etc. The classic release pipeline is a more UI driven user friendly version of this broken up to stages where you can set to deploy to different environments with approvals and gates. You can also reuse the steps in for different stages using task groups.
Go to releases and click ‘New pipeline’. If you have access with this account to an Azure subscription, as pictured, click apply next to the Azure App Service Deployment template. If not, select the ‘Empty job’ link at pictured. Now click on ‘Add an artifact’ as per below. Click on the dropdown for the Source field, note you can select artifacts from both your YAML or classic pipeline giving you the ability to mix a YAML build with classic release management. Select a either source and click Add.


If you selected Empty job task, click save in the top right and skip this section. If not, click on the ‘1 Job, 1 Task’ link and select your Azure subscription from the dropdown as pictured. Now click on the side chevron next to authorize and select ‘Advanced options’ then select the ‘Publish profile’ radio button. Navigate through the dropdowns to your webapp (you may need to login), check the ‘allow all pipelines…’ checkbox and hit Ok then Close. Now select the name of your webapp in the webapp dropdown pictured on the task view. The save button in the top right should be un-ghosted, click this then OK. Click ‘Releases’ on the left menu and you will see the below screen.


Click ‘Create a release’ then Create. You’ll see your Stage 1 with a spinner, you can click this to see the steps processing which should all eventually turn to green ticks, you can click on any of these steps to view the logs for any errors. If there were any issues you can also click on the Variables tab in the release pipeline editor, add a ‘System.Debug’ variable with the value true.


If you did setup your release to deploy to an Azure Web App, click on the ‘Deploy Azure App Service’ Step as above and at the bottom of the logs, Ctrl-Click the link.


You should now see the app from your repo pictured like this. Congratulations! you now have a CICD process in place!
Tutorial – Get started with Azure DevOps Boards, Repos
This tutorial will go through the most common steps within a DevOps process for completing a coding task.
Prerequisites
You will need git installed on your PC and VSCode if you like (or use a text file editor). If you are familiar with the Scrum methodology the below concepts will be familiar, if not, I’d recommend reading a brief overview about Scrum.
Create a Sprint work item
In the left navigation menu go to Boards > Backlog and click ‘New work item’ as pictured. Enter the name ‘Update README.md’ and click ‘Add to top’. You will see 1 issue now appears in your ‘Sprint 1’ to the right.

The default workflow for your project will be ‘Basic’, you can change your project to other available workflows like scrum or agile but this will cover the similar UI interactions used in those. You can also specify the workflow type when you create a project in the advanced setting area. These workflows can be customised or new ones added to however you like
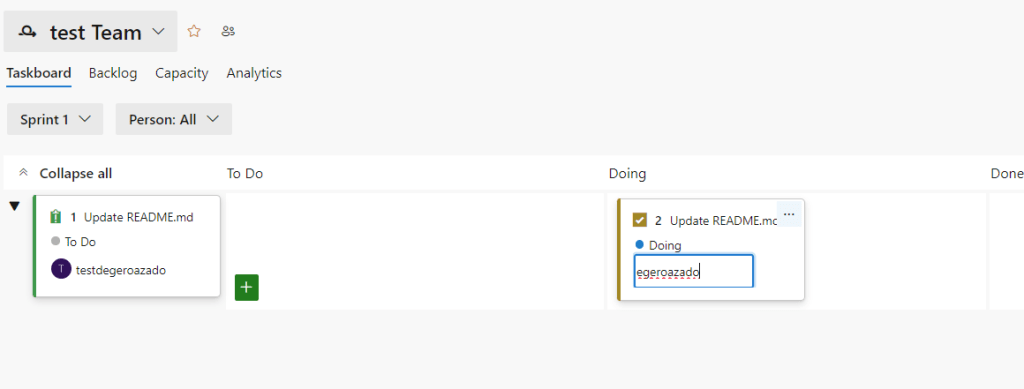
Click on the Boards > Sprints left menu item. Click on the unassigned to assign the task to yourself. Now click on the plus icon next to the issue give it the name ‘Update README.md’ and assign that task to yourself. Drag it to ‘Doing’. Take note of the ID (next to the green clipboard icon pictured below at the left) on the issue as we’ll use this later.
Next up we want to clone the repo, make changes and push them to the repo while having the commit visible on the Issue on the board (you can have it at the Task level if you want that granularity). First of all, click ‘Project settings’ in the bottom left, click repositories then click on your ‘test’ repository. Switch ‘Commit mention linking’ to on.

Commit a code change for your work item
Click on the the Repos > Files left menu and then click clone, copy the URL and use the ‘git clone <url>’ in your PC cmd line. You will likely be prompted to login, use your ADO login account.
Open the README.md file in your text editor or VSCode and change it to a single line like ‘# My ASP.Net website’. Hit save then use the git commands (replace the #1 with #<id> of your issue if it is not 1):
git add .
git commit -m "#1 - set readme to my content"
git push
View and complete your work item
Now back at your sprint view, click on your issue name in the issue box in the left. In the right of the dialog under Development you can see your commit due to using the #{ID} in the commit message. Clicking on this link will open a new tab with the commit changes.

You can also create a branch under most board items in this dialog view under the three dots on the top right, for that branch to appear here, however you will have to continue to use a #{ID} on commits for each commit to appear visible here. You can also use AB#{ID} to link, this is used to link GitHub repo commits to your board items, there are links at the bottom for how to do link in detail.
Now your work is done you can drag your task to done, add any comments, click on your issue and set your issue to done. Congrats you’ve completed a basic task tracking process.
Best practices
Committing to the main branch as we have done isn’t the best practice, even if there is only one dev, as you are likely not wanting to trigger builds/releases on every commit as would have happened with our pipelines above. This would require setting up a branch for your work and a pull request and even more protective: a policy to prevent commits to the main branch. Links are at the bottom for setting up these.
Cleaning up
You can delete your organisation if you wish by clicking the top left Azure devops logo, Organisation settings in the bottom left and then Delete organisation at the bottom of the page.
Summary
I hope this post has helped you get started with Azure DevOps. These above tutorials are just the start of using ADO, with much more powerful and complex setup scenarios documented below. If you have any feedback or issues with the guides above please leave a comment.
Useful resources
Azure DevOps
Azure DevOps Pipelines
Migrate YAML pipeline to GitHub action
ADO Pipeline to GitHub action converter
Azure DevOps Release Pipelines
Azure DevOps Boards
Linking commits and branches to ADO boards
Link Github commits to ADO Boards
Azure DevOps Repos
Good shout.
Excellent article!
The explanation of Azure Devops is very clear. I’m learning Azure DevOps at VR IT SOLUTIONS, Hyderabad — this helped me understand CI/CD concepts better.