
If you need a personal VPN on the odd occasion to access internet resources from a different IP, rather than signing up for (or getting your work to pay up for) a new VPN service, you can quickly create your own VPN server in the cloud using an OpenVPN Access Server Virtual Machine.
Some constraints
I mention using it on the odd occasion as you will accrue higher costs having a virtual machine running 24-7. It’s quick and simple to stop (deallocate) your VM so you don’t suffer costs for unused resources. You will still be charged for the VM disk and Public IP costs but as you can see in the Azure Calculator estimate these are quite low, the biggest expense is the VM compute costs. There’s also another catch compared to using a VPN provider in that if you want your switch VPN countries you’ll need to either recreate or move your VM and resources to the other Azure region.
Approximate costs excl net traffic (East US region per month, 24-7 usage)
USD$12.57 = VM – $7.59, Disk – $2.4, Static Basic Public IP – $2.36 (cheaper than basic dynamic), Snapshot – $0.22, Traffic ~$0.05/GB (5GB/mo free)
See Azure Calculator estimate for more detail
VM Disk Snapshots
If you only need the VPN very infrequently, you can keep your costs even lower you can create the VM on demand from a VM Snapshot or VM Disk (slightly more expensive) and destroy your VM when done (and optionally leave the disk if creating from disk). The VM will have to be located in the same region as the snapshot or disk. Instantiating a VM and its dependencies with a snapshot or disk will take approximately 5 minutes.
VM management automation
Rather than doing any of this in the Azure portal, VM creation can be done in plenty of other ways including terraform, bicep, ARM, azure Powershell / CLI scripts or even using Azure Automation runbooks. I have Azure CLI scripts I use to create a VM from a VM snapshot as Bash / Powershell script or an automation runbook located in my azure github repo. By following the mslearn guide to setup your Azure Automation you can add a runbook for VM creation and trigger it from your PC via a Powershell script. It’s also possible to trigger runbooks other ways including Azure CLI.
If you have a VM snapshot, you can spin up your pre-configured VM as per the scripts or runbook above, if not, to get your snapshot you can start with scripts here to create an OpenVPN VM from the Azure marketplace (where the VM image is located). In any case, you need to configure an Open VPN Server VM after installing it from the marketplace before you’d want to create a snapshot.
We’ll go through the steps below to get an VM up and running from scratch (at the lowest reasonable price) which you can then create a VM disk snapshot from and use whenever you need a fresh VM. The below tutorial assumes you have a basic knowledge of Azure, the Azure portal and have used a command line on your PC.
If you try out any of the scripts or runbooks above and you are using Powershell, type $PSVersionTable.PSVersion in the cmd line. The Powershell major version should be 7 or higher.
Tutorial – Create an Open VPN server in Azure
PreReqs – Azure account, ssh, command line (bash, powershell etc)
In the Azure portal, navigate to the Resource groups and create a new one in whichever region you want your VPN to appear from (e.g. a different country than where you are).
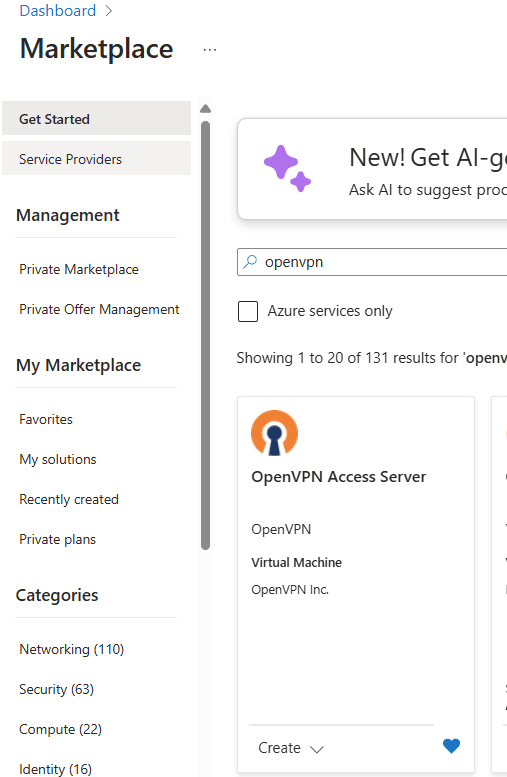
In the resource group click ‘Create’ and in the marketplace type ‘openvpn’ select OpenVPN Access server as below and click ‘Create’
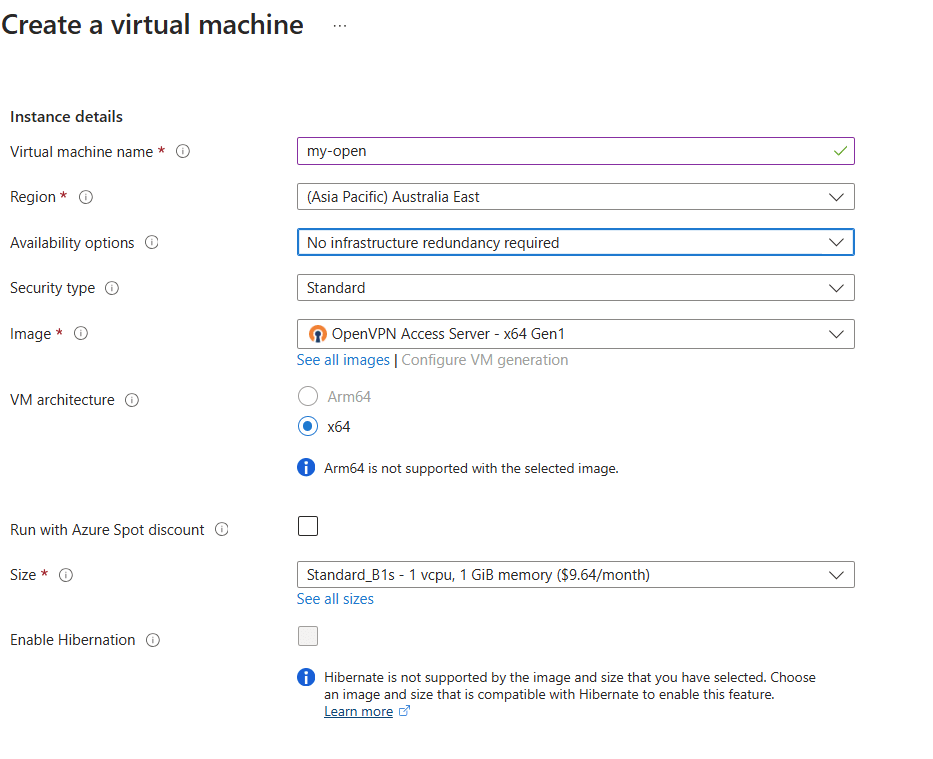
On the next screen (as pictured below) give your VM name, set ‘Availability options’ as No infrastructure redundancy and set the ‘Size’ as B1s standard. This is the lowest size that is appropriate for OpenVPN. You can lower your costs even further with spot pricing but there are some conditions to getting that low-low price including not supporting this lowest price B-series size.
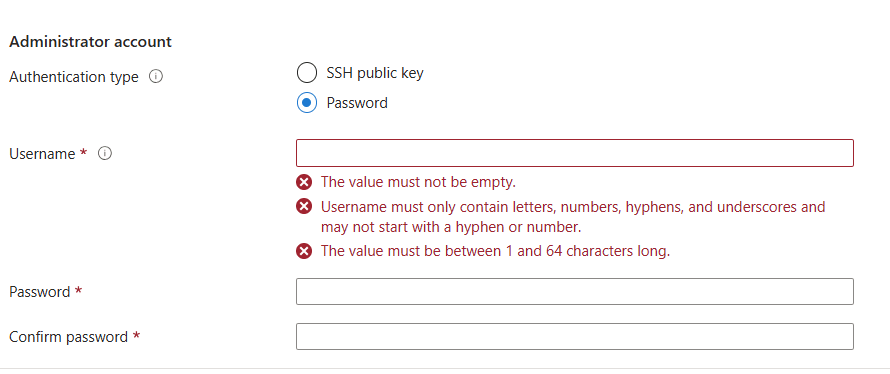
Lower down on the screen (as pictured below), set your authentication type as password and type in a username and password (make note of it, this will be for accessing the Linux server by ssh shortly). Click ‘Next’.
You could use a more secure ssh public key if you are familiar with setting up one on your PC.
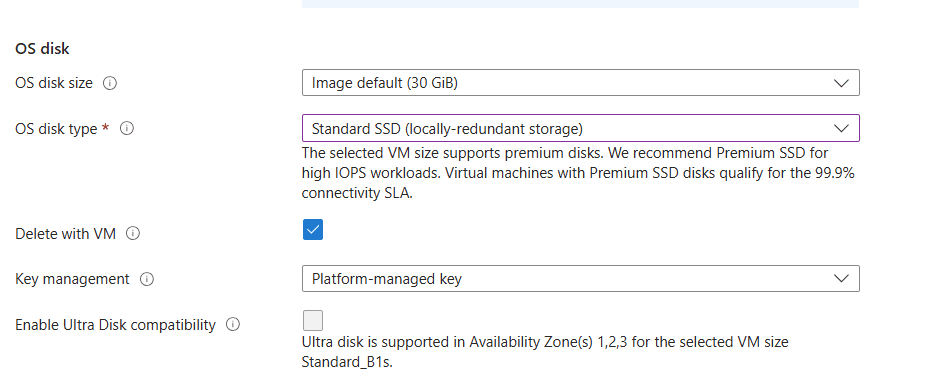
On the Disks section, as pictured below, set the ‘OS disk type’ as Standard SSD locally-redundant (you can save ~$USD1month selecting Standard HDD if need be). Click ‘Next’.
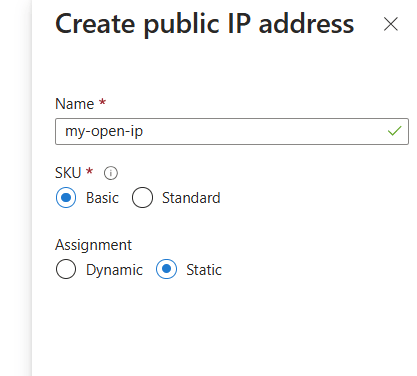
On the Network section, click ‘Create new’ under Public IP. Set it as Basic and Static as pictured (slightly cheaper than Dynamic). Click Ok on that side panel. then click ‘Review and create’ at the bottom then ‘Create’. Basic tier will retire September 2025.
After the VM has been created go to your resource group, click on the public IP resource and copy the IP address from the overview screen as pictured.

Now with your SSH username and password in bash or powershell type:
ssh <username>@<ipaddress>If prompted, accept the fingerprint and type in your password. OpenVPN will initiate setup scripts, use all the defaults on the prompts and set a password (or it can generate one for you) for the Admin WebUI user (for user openvpn). Leave the activation key as blank as a free licence is available for a small user count / 2 VPN connections.
Once the setup script has completed it will output the Admin and Public URLs. Browse to the Admin URL (it has admin at the end of the url). Your browser may give an invalid SSL cert warning, just ignore this and login with the admin user/password you set from the setup scripts
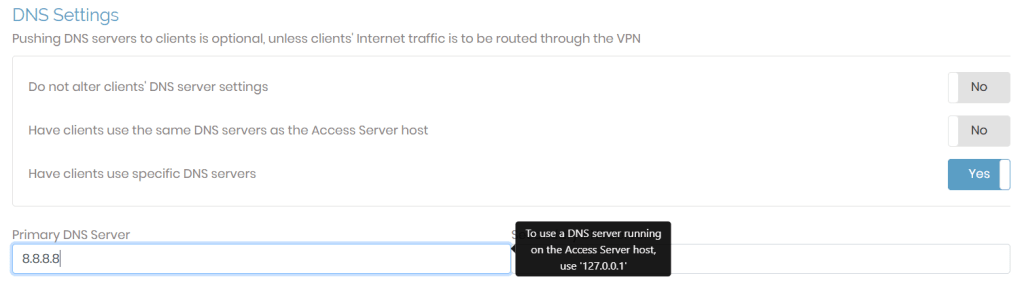
Once logged in on the left navigation, go to Configuration -> VPN settings. Under DNS settings, click Yes on ‘Have clients use specific DNS servers’ and set Primary DNS Server to 8.8.8.8 (google’s DNS)
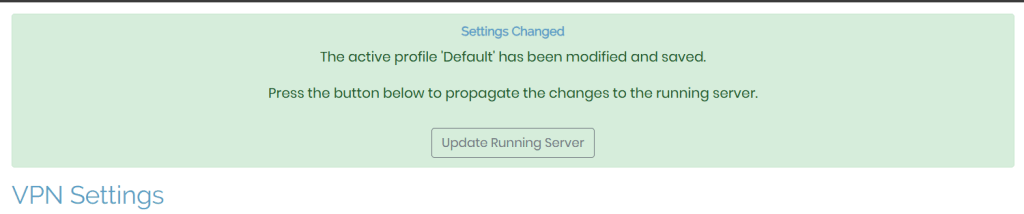
Click save settings at the bottom then Update Running Server at the top of the page as shown.
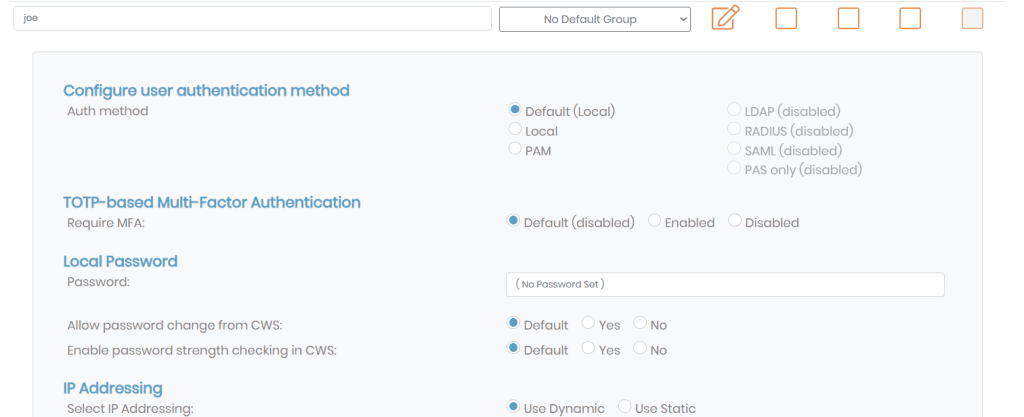
In the left navigation go to to User management -> User Permissions, enter a username (it’s joe below) in the new username (this if for your PC’s vpn client to connect to the server). Click for ‘more settings’ via the pencil icon, enter a password into the Local Password, then click Save.
Click Update Running Server in the green panel as we did on the DNS settings screen.
Logout from this site, change your browser URL to remove ‘/admin’ and everything after it to load the Client access website. Login as the user you just created and as pictured below, click the Yourself (user-locked profile) at the bottom to download your VPN client profile. Click on a download link higher up for whichever platform you are using and install the client application.
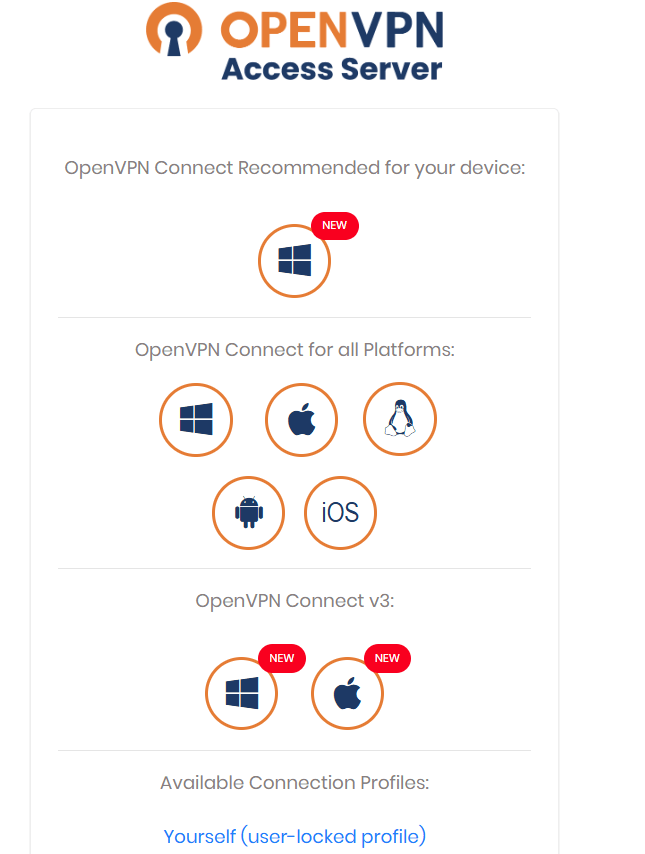
Once you have installed the application on your PC. Open the downloaded profile .ovpn file. The client will launch with the profile, check Save password and enter your password then click Connect. You should now see a green connected state.
Open https://whatismyipaddress.com/ to see if you now have an IP from the target location where you set the VM.
🎉Congratulations!🎉 You now have your own personal VPN server.
Dont forget to stop your VM!
It’s important to stop (deallocate) your VM when you are not using it to save being billed for unused compute hours. You can do this in Azure portal by viewing your VM and clicking ‘Stop’. Alternatively you can use these (interactive) Azure CLI scripts in Powershell or Bash to change your VM state between stop/start/restart/deallocate.
—– Bonus Section – Create a VM snapshot —–
Now that you have a VM, you can create a snapshot so you have you pre-configured OpenVPN Access Server with your VPN client user setup ready to go. Whenever your create a VM with your snapshot you can instantly connect with your VPN client on your PC. When you are not using your VM you can just delete your whole VMs resource group (but make sure your snapshot is not in the resource group!) and save on any expenses except the snapshot storage.
If you don’t mind the higher cost of a VM disk and not having a baseline with a snapshot. You can keep a disk lying dormant, skip creating a snapshot and just delete all your resources except the disk. This can then be used to create a new VM as you need.
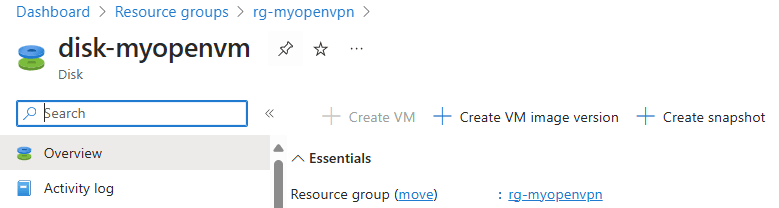
Navigate to your VM resource group and click on the VM disk, click ‘Create Snapshot’ as pictured
As pictured below, create a new resource group to store the snapshot, select a Full snapshot and storage type as Standard HDD Locally-redundant. Click ‘Review and create’ then ‘Create’.
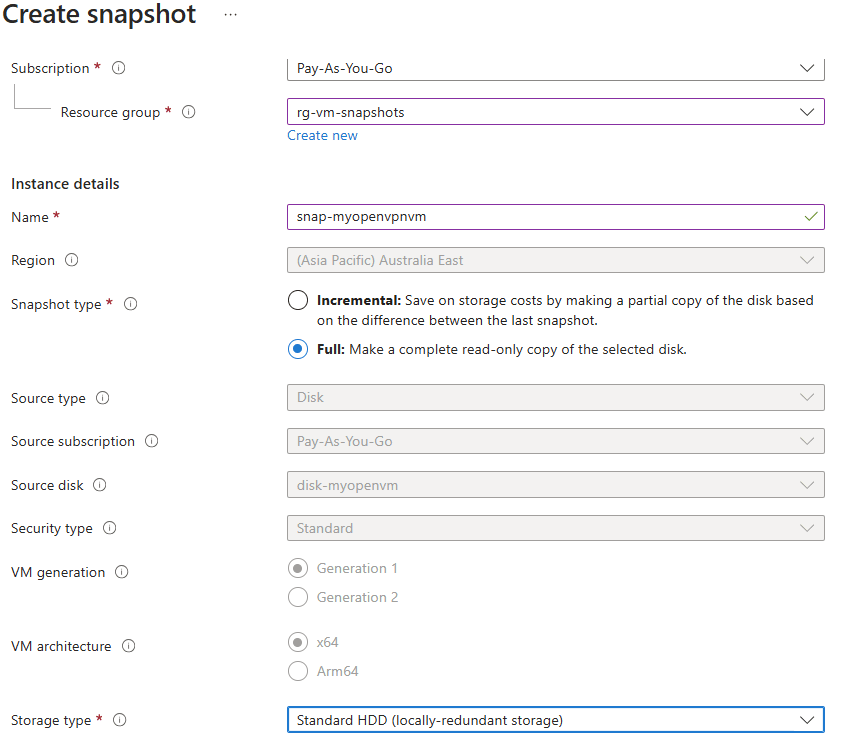
Note on the screen that the snapshot region is fixed to the VM disk region. You can only create snapshots or restore VMs from within the same region.
Once your snapshot is created, we can a new VM from it. You can use the scripts to do this or continue the steps below in the portal.
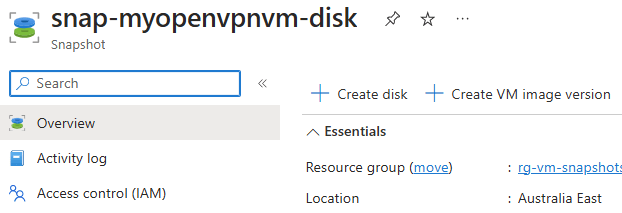
Navigate to your snapshot resource and click ‘Create disk’ as per below.
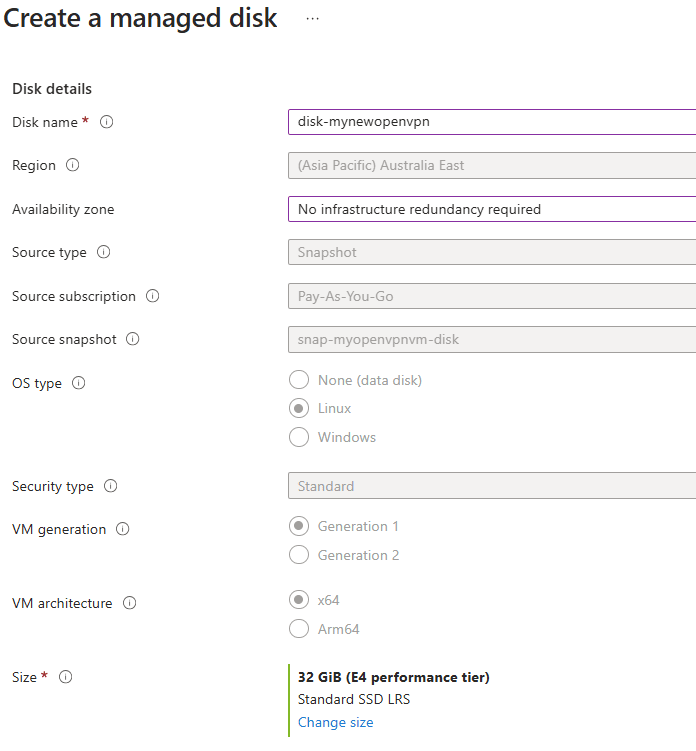
Create a new resource group for your new VM disk, as below, set a name, set the availability zone as No infrastructure redundancy, change the Size at the bottom to Standard SSD LRS. Click ‘Review and create’ then ‘Create’.
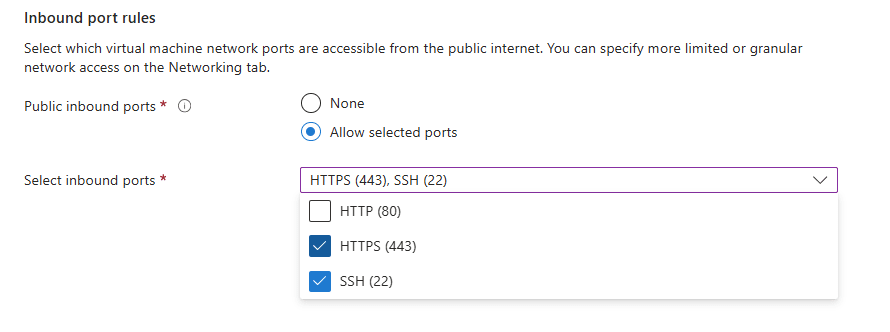
Now you have a VM disk, you can create a new VM with the same settings we used when creating the OpenVPN Access server earlier. Navigate to your new disk resource and click ‘Create VM’ as we saw on the previous picture (it was greyed out). Use the same redundancy and size settings as pictured. Additionally set port 443 open as pictured below. Unless you need to use ssh any more, it is also a good idea to disable this.
Click on ‘Networking’ and setup the public IP with the same settings we did on the previous VM. Click ‘Review and create’ then ‘Create’
Once created, navigate to your VM and copy the IP address like we did previously. Open your OpenVPN Client app. Click the pencil icon next to your profile, set the IP in the Server override field and click Save. Now press Connect and test https://whatismyipaddress.com/ again to verify the VPN location.
🎉Well done! You can now delete your VMs resource group whenever you are not using it and recreate it from your snapshot🎉
Now that you have a snapshot, you can create a VM from it in a much quicker than what we just did by using these scripts in either Azure CLI with Powershell or Bash. Or with the Automation runbook mentioned earlier.
Changing your VPN Server country
At the start I mentioned one of the caveats of using the OpenVPN Access Server is if you which to change the location of your VPN your will need to either recreate or move your VM (and disk, vnet, nsg, nic). There are 3 primary areas move VMs, either through backup and site recovery platforms, manually copying a disk/snapshot to a new region or through the resource mover.
The Resource mover is recommended by Microsoft over something like Azure site recovery (this has costs albeit very minimal). Resource mover is simple to run but does take approximately ~20minutes to run through all the steps. Site recovery is more complex to get up and running, takes much longer than resource mover and has conditions on which regions you can move to. There are guides for moving your VM with the Resource mover or Azure site recovery.
A quicker option than these HADR platforms and Resource mover is to export your VM Disk / Snapshot to blob storage in the target region then create a VM disk from the blob storage source. This easily takes under 20 minutes and even quicker if done via scripts but there will be a data transfer cost. You could leave copies of your VM disk/snapshot in blob storage of the countries you’d like to switch between frequently and just restore VMs from them on demand.
The quickest option by far is to just create a new VM from scratch in the new region however you wont have the OpenVPN server initialised nor the vpn client login user. If you do find you want to change regions a lot it may be worth using a script for the Open VPN Access Server cli to carry out some of the steps we did to initialise the server set the DNS and new vpn PC client user. The minimal cost overhead of using storage accounts in target regions mentioned above makes this option less appealing as it is more complex and time consuming.
There is a more extreme method of leaving the VM in its created region and using vnet peering to the target region’s load balancer + public IP you wish to use, but as the traffic costs in vnet peering range from $USD0.03-0.09/GB it is a cost that doesn’t seem worth the infrastructure/cost overhead and you would need to adjust this every time you wanted to use another country.
Cleaning up
In the Azure portal, navigate to your resource group(s) and click ‘Delete resource group’. If you wish to continue using the snapshot in future make sure to leave this resource group.
Alternatively if you have azure cli:
az group delete -n <resourcegroupname>Summary
I’ve found having my own VPN Server ready to go quite useful for both work and personal use, even with the drawbacks mentioned such as difficulty to change country and costs when using it frequently. As I use it use a VPN infrequently this is handy for myself without signing up for 2 years worth of a commercial VPN service I don’t use very much.
If you have any feedback or issues with the steps please leave a comment. I hope this post has helped you try out OpenVPN or get familiar with using VMs in Azure.🙂
Useful resources
Custom scripts
These are from my github/degero/azure
Create a fresh OpenVPN VM from Azure marketplace
Powershell script – Create VM from Azure marketplace
Bash script – Create VM from Azure marketplace
Create an OpenVPN VM from snapshot
Powershell script – Create VM from snapshot
Bash script – Create VM from snapshot
Automation Runbook – Create VM from snapshot
Powershell script – Trigger Automation runbook Create VM from Snapshot
Change VM state (start/stop etc)
Automation Runbook – Change VM state
Powershell script – Trigger Automation runbook Change VM State
Guides
Creating a VM
MS Learn – Create VM Terraform
MS Learn – Create VM Powershell
MS Learn – Create VM Azure CLI
Moving your VM to another region
MS Learn – Copy snapshot to Azure storage
MS Learn – Create VM Disk from Azure storage blob (Powershell)
MSLearn – Azure site recovery – migrate vm to new region
MSLearn – Azure resource mover – Move resources to new region
Azure automation