Azure SQL Server has many networking options for controlling access to its public IPs including:
- Allow all Azure Services and Resources setting
- VNet Service Endpoint and rule (allows a VNet’s services and VMs access)
- Server level firewall rules (eg allow your IP to connect and manage)
- Database level firewall rules
- SQL connection policy
There’s a lot of flexibility here BUT your SQL data is still accessed and transmitted on public IPs (yes a VNet Service Endpoint resolves to a public IP). While the firewall rules and encryption in transit / rest offered are good defences, it’s possible to secure things further. Ideally, when sensitive data is stored, we want to have this data transmitted and accessed privately to have the lowest risk of interception or unwanted access (eg. due to misconfiguration, leaked credentials etc).
It’s important to note that network security is only one piece of the puzzle. Well Architected Framework Security Pillar practices such as Defence in Depth should be adopted where possible. You can find details specific to Azure SQL Server security that cover some of theses defense in depth layers.

The Problem
The security of my data in transit and access to the data is of the utmost importance. I want to secure my Azure SQL Server and its traffic from the public internet while allowing my application(s) to access it privately.
The Solution
Azure Private Link. It has an SLA of 99.99% and availability in all regions except China. Private Link (interchangeably referred to as private endpoint) allows you to take advantage of many of Azure’s PaaS offerings but is kept away from the public internet. There are other use cases for Private Link on SQL Server but we’ll focus on a common scenario where an internet facing application needs access to secured SQL data. Private Link has a 0.01USD/hr + 0.01USD/GB in/egress cost attached to it, but the security advantage seems well worth it if you have sensitive data!
The two key steps to secure your SQL Server from the public internet is enabling Private Link and disabling public access. One drawback to disabling public access is accessing the SQL server for maintenance and administration as you can no longer access on the public IP. It introduces an additional cost either by adding a VM to the VNet, linking to the VNet by VPN Gateway and access by VPN. Be sure to weigh up whether the sensitivity and security of your data are worth these conditions. To get an idea of costs please look at this Azure Calculator example.
Tutorial: Connect web app to Azure SQL via Private Link and Private DNS zones
Creating Azure resources for investigation and testing can be costly. This example aims for the lowest expense by including manual steps of scaling the App Service plan and enabling Private link. It assumes you have a basic knowledge of navigating the Azure portal, VSCode and using git.
Below is the infrastructure we will deploy (except Azure SQL Server) via bicep then introduce a Private Link via the portal. For production workloads a App Gateway + WAF is recommended to access the App Service.

Pre reqs
- An active Azure subscription
- Azure SQL Server Free instance with an empty database and with IAM and user+password access there is a guide here. Be sure to add your current IP to the Azure SQL Server Networking blade > Public tab > Firewall rules area.
- Visual studio code with Azure Tools Extension, Azure Bicep Extension
- .Net 8.0 SDK (to build demo app to deploy)
- Azure Data Studio (to access your db)
- Git command line
Steps
- Clone the git repo: degero-examples/azure-sqlwebapp-demo (github.com) with bash/powershell:
git clone https://github.com/degero-examples/azure-sqlwebapp-demo.git - Open this folder in VSCode and Modify the IAC/bicep/local.bicepparam with your sql server details (servername, dbname, sqluser and password) This is used here only for ease of setup
- Run the bicep file with VSCode to deploy the App Service, DNS Zones and
- With the main.bicep file open in VSCode press F1
- Type bicep and select ‘Deploy bicep file’ and you will get a series of prompts
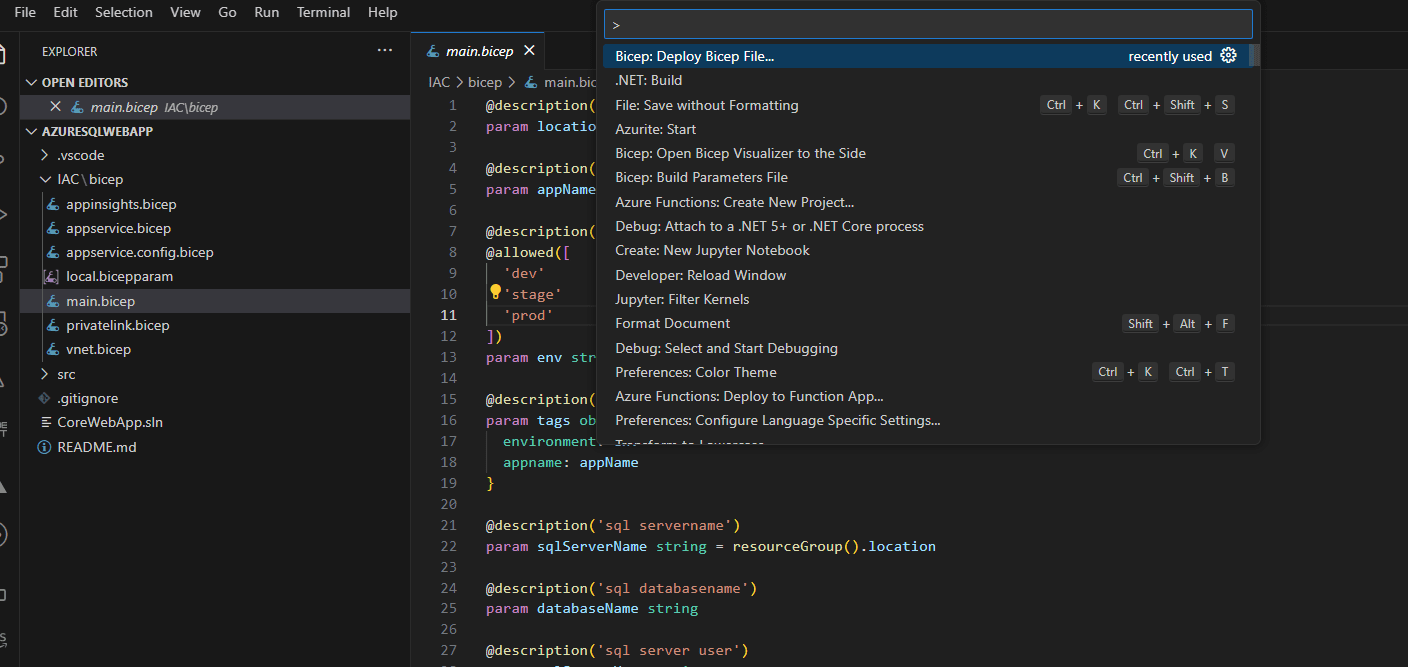
- Enter any name for deployment, select a subscription and select the resource group to create resources in (best to create a new one to delete later)
- Select the local.bicepparam in the IAC/bicep folder you just modified to be used with the deployment
- Deployment will start, you can then check your deployment in the ‘Bicep Operations’ on the Output tab at the bottom.
- Be sure to delete / revert your local.bicepparam now

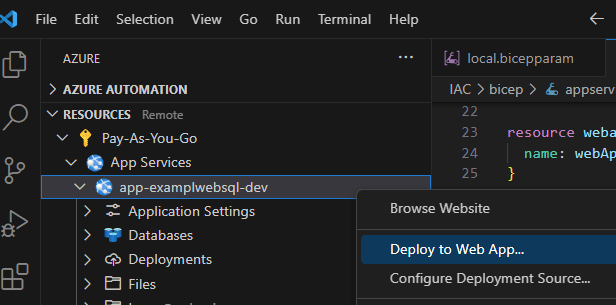
- Deploy code to your new Azure Web App resource
- In VSCode open the Azure extension
- Browse the resources under app services and locate ‘app-examplewebsql-dev’
- Right click and select deploy
- Try connecting to Azure SQL Server with Data Studio
- Open Azure Data Studio and click ‘New connection’ button in the Connections sidebar
- Use the browse tab on the connection window that opens and browse to select your test db
- Connect and check you can access your test db
- If the default Entra ID auth isn/t working try your admin user/pass as used in the bicep
- Close Data studio
- Check the Webapp
- In the VSCode Azure resources area used in step 4, right click the webapp and select browse website.
- The Site should load and display like below, this confirms the public endpoint for your SQL database has been accessed by your webapp. You can also go back to your Data studio to confirm the data has seeded.

- Turn off public access and enable private link on the SQL Server
- In the Azure portal navigate to your Sql Server instance and click on the ‘Networking’ in the summary page
- Click the ‘Private access’ tab and click ‘Create a private endpoint’

- Select the resource group you deployed the bicep file to earlier and give it a name then click ‘Next’. Use the defaults used on the ‘Resource’ tab and click ‘Next’

- On the Virtual Network tab select the virtual network created in your target resource group and use the ‘services’ subnet (there is a webapp subnet as well). Leave the rest as defaults and click ‘Next’
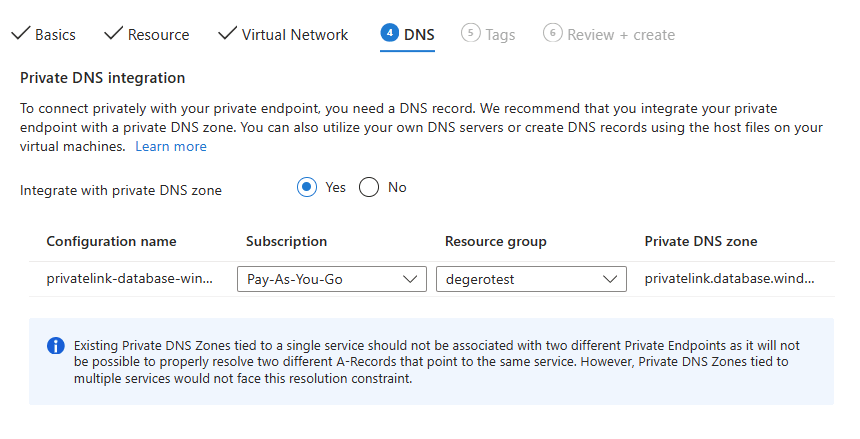
- On the DNS tab select your resource group targeted with the bicep and it should appear similar to above, click ‘Next’.
- On the Tags tab click ‘Next’ then click ‘Create’
- Navigate to your Sql Server instance and click on the ‘Networking’ in the summary page
- In the ‘Public’ tab, set Public network access as disabled and click ‘Save’
- Scale the App service plan to B1 to allow App to integrate to VNet and access Azure SQL Server
- Navigate to your app service in the azure portal
- Under the Settings section of the left blade click ‘Scale up (App Serivce Plan) then check ‘Basic B1’
- Hit apply then upgrade

- Click ‘Networking’ in the Settings blade and click on ‘Not configured’ under ‘Virtual network integration’ of ‘Outbound connections’

- Click ‘Add virtual network integration’

- Select the resource group with the web app and ‘vnet-examplwebsql-dev’ and the ‘webapp’ subnet, click ‘Connect’
- Reload the webapp you viewed in Step 6. And it should load successfully.
- Reopen Data Studio and try connect to Azure SQL Server in your connections list
- You should get the below error as its access is now no longer public
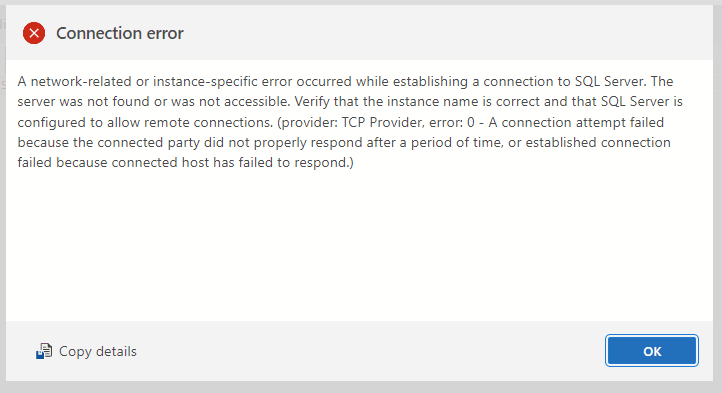
- You should get the below error as its access is now no longer public
Cleaning up
Be sure to delete the private endpoint and scale your app service back down the Free plan done in Steps 7 and 8. Alternatively if you no longer want to use any of these demo resources, delete the resource group.
How do I connect to my Azure SQL Server now?
If the case arises where you do want to connect to your production Azure SQL Server there are guides here to create a Windows VM and add it to your VNet. Or you could use a Open VPN Client on a Point to Site VPN
Summary
In this tutorial we deployed an app service with vnet integration and connected it to a azure sql server private link via the same connectionstring hostname used on the public IP <yourserver>.database.windows.net and verified it was no longer accessible publicly.
It’s important to note some security practices have been skipped for the sake of this tutorial and are not recommended in production such as using sql admin + password, adding as the connection and storing in the bicep localparam. It would be much better to use IAM and a Managed identity for the Web app to connect to the the SQL Server, also removing the need to have these in the bicep localparam file
If you have any feedback or issues with the steps or sample please let me know in the comments below and happy hacking in the cloud!
Further reading
Example production Web App with Application gateway costs: Azure calculator
Private Link: other use cases
Architecture Center: Baseline High Availability Web App
Thank you for this excellent article It was very helpful and informative.
awesome